Thursday, March 30, 2017

Assignment 8

Grids and Snoots

Each person will post their own images and analysis.

Research film noir portraits. Choose one photograph to replicate. Use AT LEAST two grids or one grid and one snoot.

Spend some time editing your image in Lightroom (convert it to black and white and adjust the lighting using all of the global and local adjustments available to you in the develop module.)

Post a description of your setup (drawing/diagram even better) and discuss how the grids helped you achieve the lighting in your portrait.

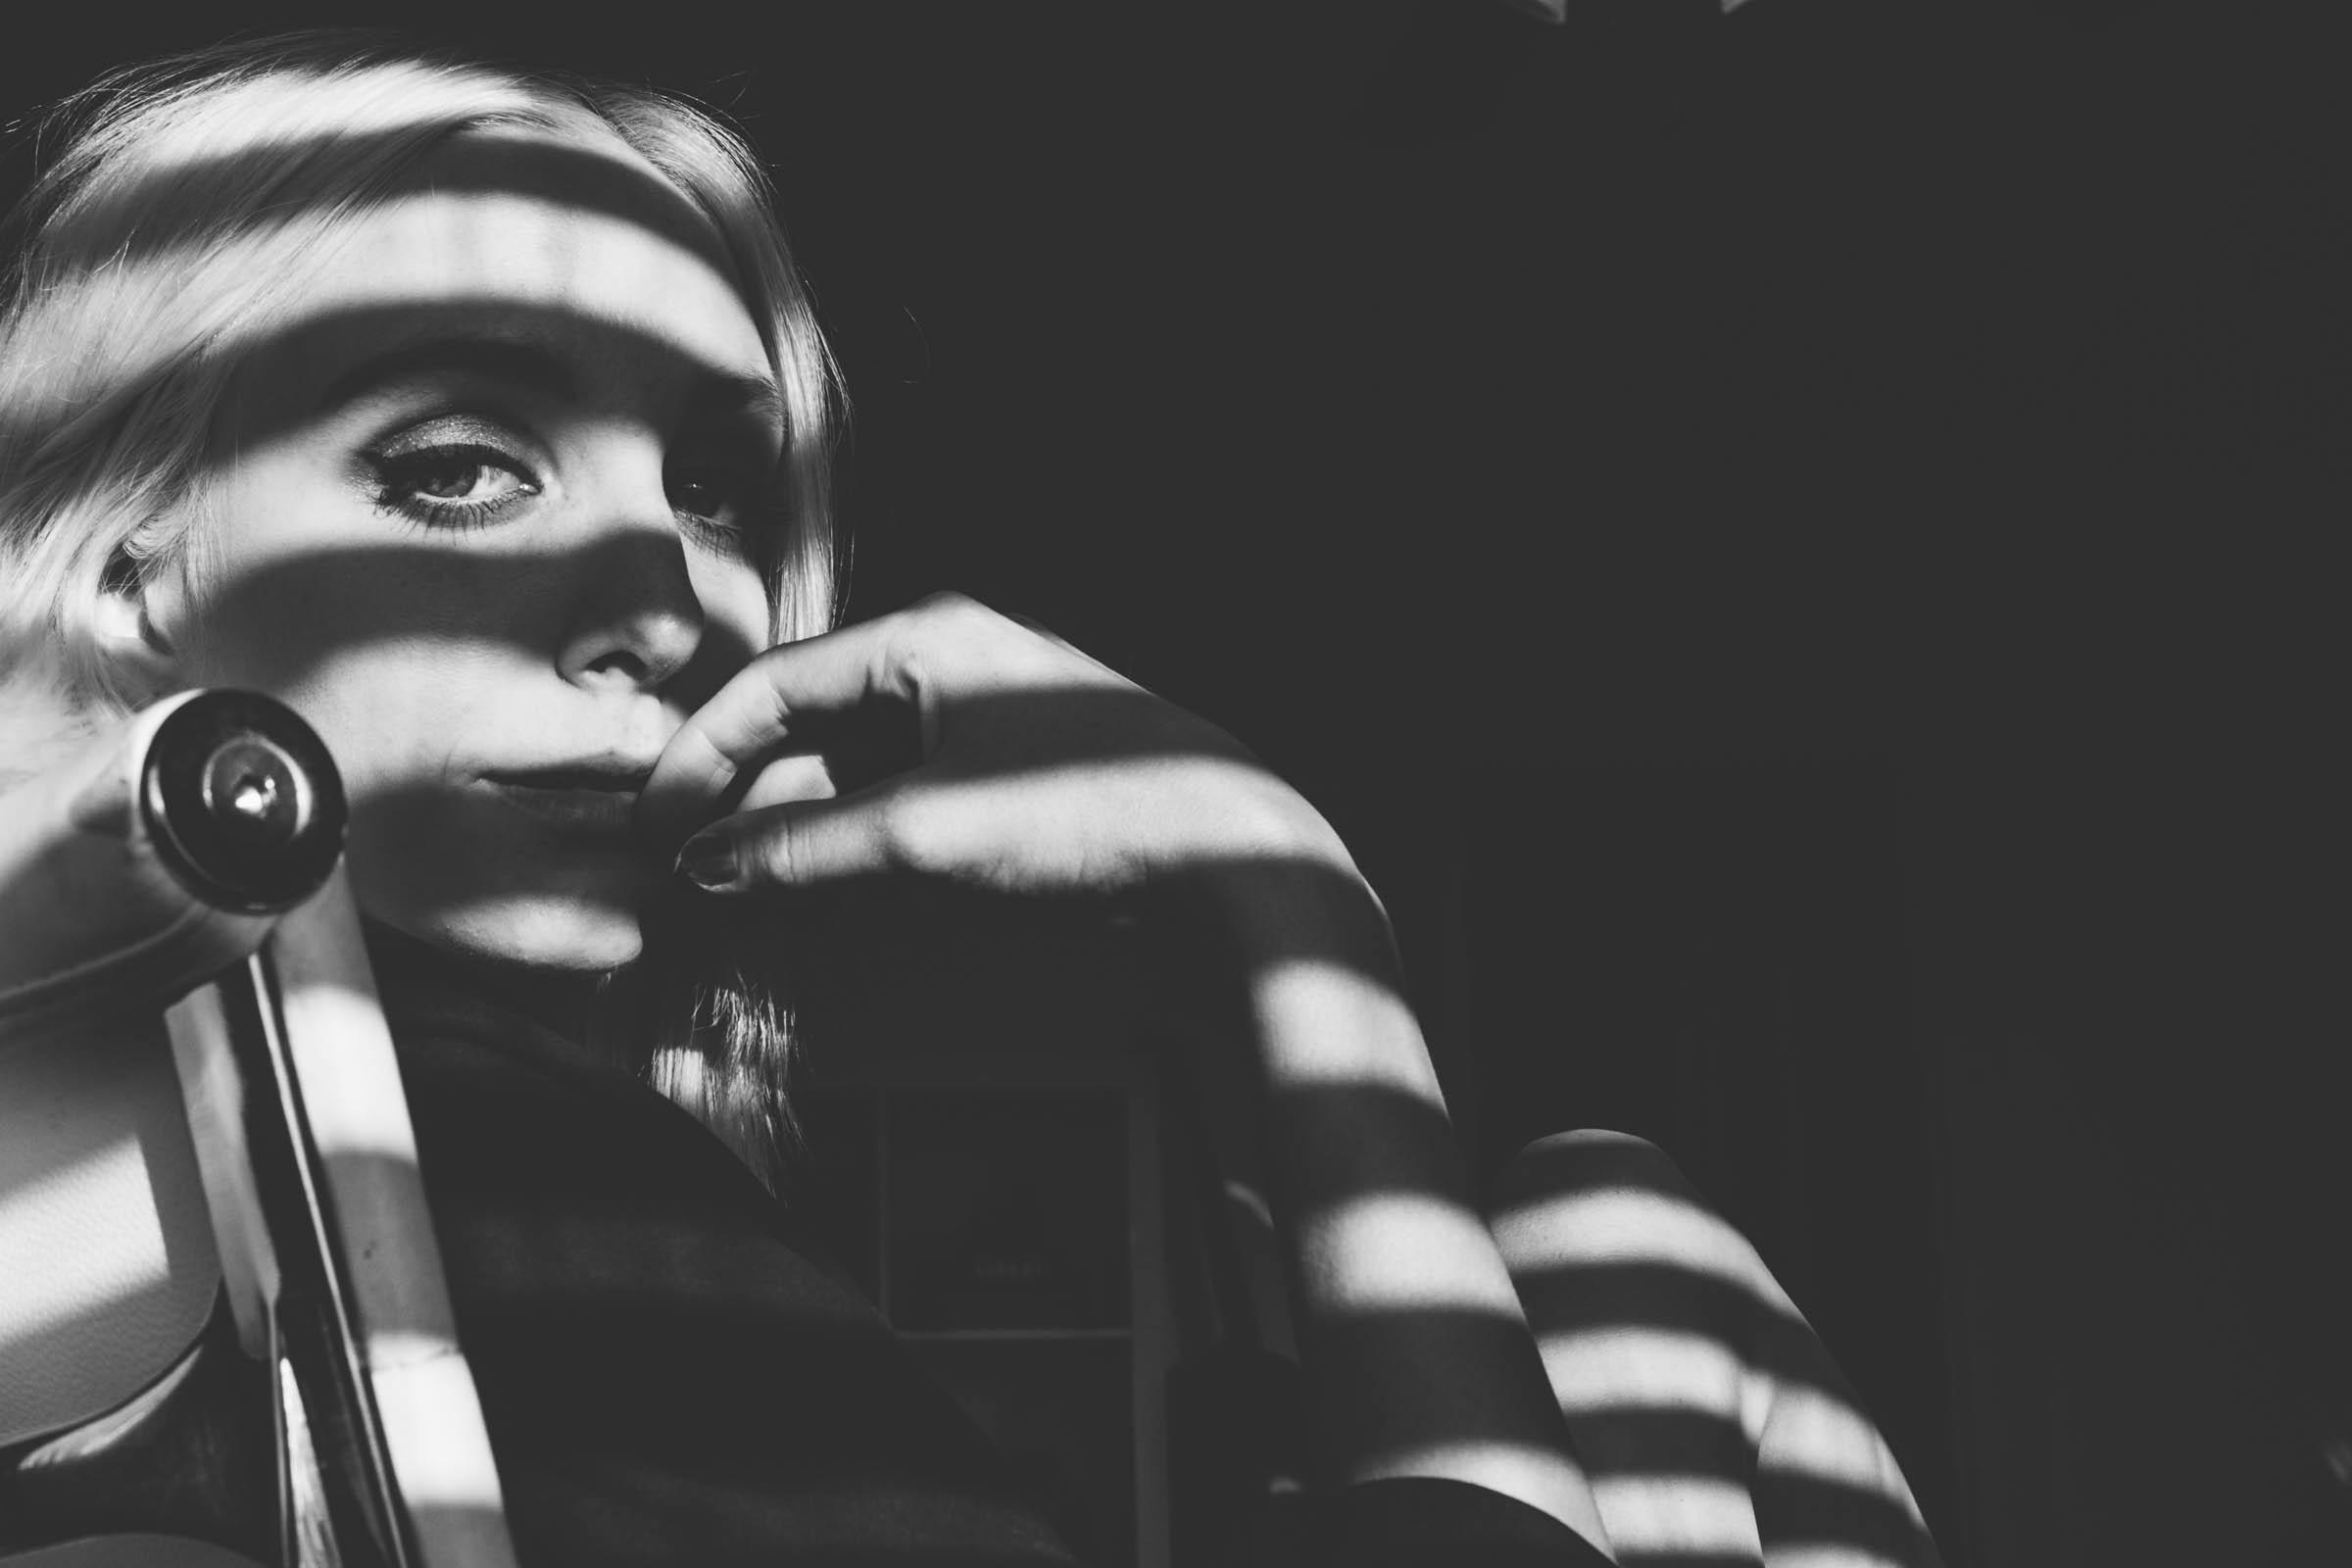
While researching film noir portraits I came across many, but wanted to try and tackle the film noir portrait that included shadow blinds in the photo.  I did my best to try and find a portrait that I felt I could replicate.  In the photo above, it appears that light is coming from one source and it may even be natural light streaming through a window with shades.

To try and produce blinds shadows on the subject/scene, I figured I would need to build something. Below is my creation.

Cardboard grid with black foil and tape.
I cut out slats in cardboard to replicate blinds and covered it in foil and black tape.  You could attach this to tripod or have someone hold the grid to have the light fall across the eyes.


f/3.5, 1/60, ISO 100  1600 Key light - 10' 100% 20 grid  1600 Fill light - 5' -5f quarter power
I chose a 20 grid for the key light hoping for a more intense and concentrated light on the subject and a 40 grid in the fill for a more diffused look.  Initially, the strobe continually blew out the shadow lines.   With this happening we did change the intensity of the key light a few times and then eventually moved the strobe far away from the subject (10') at full power.  With the grid close to the subjects face we began to notice lines showing up, however they were not to the thickness or shadow weight I was hoping for.  Because the assignment called for two grids or a grid and a snoot, I did add the fill light to the right which is not evident in the professional photo above.  We began to set up key and fill lights at first, but recognized it is best sometimes to start with one light and build from there. I would need to experiment further to really replicate the shadow seen in the professional photo above.


f/3.5, 1/60, ISO 100  1600 Key light - 10' 100% 20 grid  1600 Fill light - 5' -5f quarter power


Light set up.  Key to left, fill to right. Holding grid and photographer shoots subject to the right of grid


Wednesday, March 22, 2017

Assignment 7

Part 1: Take two photographs of a still life setup. The first will be with just the reflector on the 1600 strobe. Then, without moving the light at all, add the small white umbrella to the strobe & reflector and take another photo. (Don’t forget to meter for both pictures!) Describe the difference between the shadows and overall lighting in these two images.

1600 Strobe with Reflector - 1/60, f/18, ISO 100

1600 Strobe with Reflector and White Umbrella - 1/60, f/13, ISP 100
The two images utilize the same light source at the same distance but one diffuses the light with the use of an umbrella.  In the top image, the highlights are a little more blown out than in the bottom image that uses the umbrella, but not by much.  You see increased highlights in the flash which sits to the right of the camera (the viewers left).  What you really notice in the two images, is the softness of the shadow that casts to the back of the camera.  The shade of the shadow remains the same, perhaps because the light source distance has not been changed.  In 1600 strobe with reflector image, the bright direct light casts a well outlined shadow of the camera handle and camera, while the 1600 strobe with reflector and white umbrella image has a softened shadow.  The light source was about 3.5' away from the subject.  In the top image, I do see some more of the shadows pulled out.  If I had to choose between the two images, the second image with the umbrella is far more pleasing simply because the shadow adds to the photo and does not distract from the overall image.

Part 2: Then, take two portraits. Using, the large umbrella in one and the small umbrella in the other, your goal is to produce the same type of lighting in each photograph. Think about subject placement, the light, and the background. Measure and record the distance of each light source from the subject and then describe how you came to this conclusion. It may be be useful to use a tripod for this so that you are not changing the camera angle much.

1600 Strobe with Reflector and Small White Umbrella 5' from subject f/13, 1/60, ISO 100

1600 Strobe with Reflector and Large White Umbrella 8' from subject - f/8, 1/60, ISO 100
I started with the small umbrella at 5 feet from the subject in the first image.  Shadow not terribly harsh and lighting overall is a little brighter (not necessarily overexposed) but just brighter than you may want in a portrait.  After reviewing, the first image, I determined which direction the larger umbrella should move.  I figured in order to obtain the same type of lighting exhibited with the small umbrella (most notably how the shadow casts), I would need to make the large umbrella smaller by moving it farther away from the subject.  I ended up with the subject 8 feet from the light source and metered for correct exposure.  It seems that moving the light farther away from the subject with the large umbrella made the color value of the gray background change to a lighter shade of gray as compared to the darker gray seen in the first photo.  The skin tone of the subject also changes.  It always depends on the style you are hoping to achieve, but in a casual portrait such as this, I would think that the second image would be the best choice. 

Wednesday, March 8, 2017

Assignment 6

 
Set up a still life.  Light the still life in an interesting way. Then, use your understanding of depth of field to make two photographs:

1. Shallow DOF (less in focus front to back)

2. Greater DOF (more in focus front to back)

Post: 2 photographs. Label each image with your camera settings in the following format: ISO 100, 1/125 @ f/3.5.

Describe your setup (i.e. how many lights you used, where the lights were in relation to your subject, whether you used fill cards/diffusion, the settings of the strobes, etc.). Then discuss what you did in each photograph to emphasize the Depth of Field.


Shallow Depth of Field


ISO 100, f/4.0 @ 1/60
First a 1600 strobe was set up to the right of the composition and at roughly a 45 degree angle.  We settled on the light at around -3 after taking a meter reading to arrive at an aperture of 3.5.  I set mine at 4.0 with ISO 100 and 1/60.  A reflector may have been a good idea here just a little to the left of the composition.  I set my single point focus on the white bird next to the basket about of a third of the way into the composition.  The focal plane field was the white bird and the cat, while the rooster and cow are out of focus. 

Wide Depth of Field

ISO 100, f/16 @1/60
The lighting set-up is similar to the first.  We increased the intensity of the light to nearly full power and used the light meter.  F/16 was the suggested aperture.  Here I tried to set-up an engaging composition, something that would allow me to show a wide depth of field.  I single point focused on the rooster on the top of the "barn" and took the shot.  The result is the entire photo from front to back is in focus.  The bunny in the back begins to show a little softening, but not much.  Here I could have also used a reflector on the left side to provide a soft light there.  

Wednesday, March 1, 2017

Assignment 5


Using Rembrandt lighting, create a portrait with key, fill, and backlight. Post one photo of each part of your setup along with a label that says which light it is:

1 key light

1 fill light

1 background light

1 with all three lights combined in the same photograph

3 Light Set-up deconstructed


Freestyle 1 & 2

Freestyle creative light set-up 1 yielded the above result.  See the 3 light set up diagram below. 


1600 Key light at 1600 was nearly full power with fill light at -1 and set far back from the subject.  The 800 light in back on medium power was lower than all the rest with the light directed straight toward the back.  I should have tried with the 800 back light shining straight upward to get hair light on the bottom of her hair.  Settings f/16, 1/60 and ISO 100.

Freestyle 2 with light set-up diagram below.
The following light set-up had the Key light dimmed a bit as I was looking for a less intense light on the subject.  The light intensity of the fill light increased as well as it was brought closer to the subject.  Back light was brought over the subject's head to create a hair light that is different from the first.  In the first, the lack of hairlight and the key light providing much of the light on the hair, gives way to a very dull flat look while the less intense light over her head provides a warmer glow.